Previously I made a clutch slave with a 25mm piston. I bought a 9.5mm master cylinder and hooked it up. No go, the master only moved the slave piston a little under 1mm, not enough to separate the plates, so, back on the lathe.
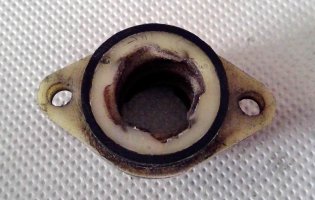
I had a couple of 20mm hydraulic ram seals so turned up a slave from 6061, recessed the top to take the seal and turned up a 20mm stainless piston.
The slave sits inside the cover near the sprocket and chain, so, its a rather dirty environment. There was imsuficient space to add a dust seal. Instead I turned up a 3mm cover which also doubles as a seal stopper, stopping the seal from popping out.
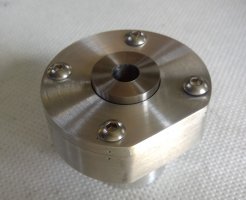
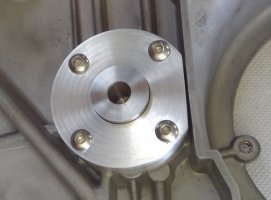
To mount the slave I shaved 3mm off the side to miss the wall separating the area from the alternator. Then mounted the cover on the mill and bored the mounting hole out from 26 to 29mm, making a neat fit for the slave. To hold the slave in place, I drilled the M5 threaded holes through and recessed the outside of the cover to fit the Allen heads.
Hooked up the master to test it out and discovered the piston had jammed. I managed to get it apart only to find the seals had expanded, now too big for the bore. The add for the master said it was mineral oil friendly, so taking the sellers word, that's what I used. As we all know, introduce petrolium based products to brake seals and they expand, so the ad was obviously wrong, the slave is brake fluid friendly.
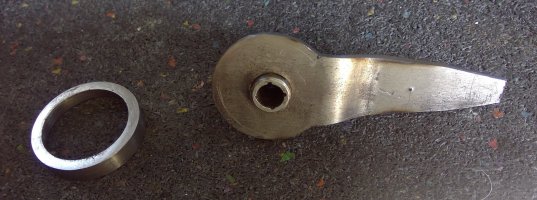
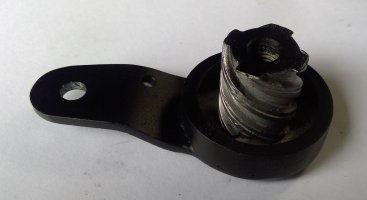
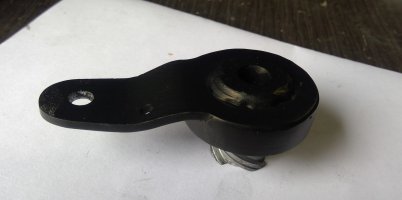
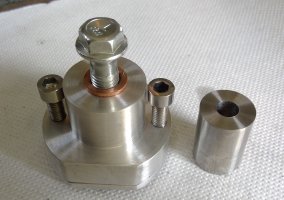
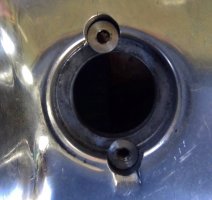
I can't get any seals for this master, so it went in the useless parts drawer and I set about modifying the cover to take the original screw type actuator again. Two stainless T nuts were turned up to fit in the 6mm hole, threaded internally M5 and then pressed into place. A Delrin ring 26mm ID, 29mm OD was then turned up and pressed over the screw actuator and the lot assembled.
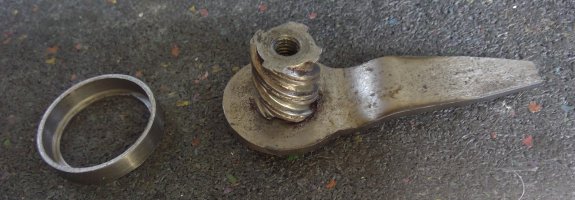
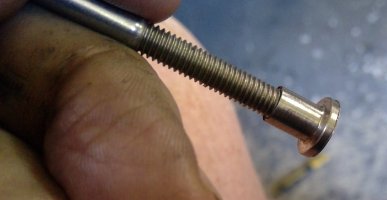
To ease the clutch pull for my fused arthritic fingers I made an extended lever for an old actuator by 5mm, turned up a seal keeper and welded everything together. So, back to cable operation.
If I ever manage to find seals for the master I simply have to press the stainless T nut out of the case and install the 20mm slave.
I had a couple of 20mm hydraulic ram seals so turned up a slave from 6061, recessed the top to take the seal and turned up a 20mm stainless piston.
The slave sits inside the cover near the sprocket and chain, so, its a rather dirty environment. There was imsuficient space to add a dust seal. Instead I turned up a 3mm cover which also doubles as a seal stopper, stopping the seal from popping out.
To mount the slave I shaved 3mm off the side to miss the wall separating the area from the alternator. Then mounted the cover on the mill and bored the mounting hole out from 26 to 29mm, making a neat fit for the slave. To hold the slave in place, I drilled the M5 threaded holes through and recessed the outside of the cover to fit the Allen heads.
Hooked up the master to test it out and discovered the piston had jammed. I managed to get it apart only to find the seals had expanded, now too big for the bore. The add for the master said it was mineral oil friendly, so taking the sellers word, that's what I used. As we all know, introduce petrolium based products to brake seals and they expand, so the ad was obviously wrong, the slave is brake fluid friendly.
I can't get any seals for this master, so it went in the useless parts drawer and I set about modifying the cover to take the original screw type actuator again. Two stainless T nuts were turned up to fit in the 6mm hole, threaded internally M5 and then pressed into place. A Delrin ring 26mm ID, 29mm OD was then turned up and pressed over the screw actuator and the lot assembled.
To ease the clutch pull for my fused arthritic fingers I made an extended lever for an old actuator by 5mm, turned up a seal keeper and welded everything together. So, back to cable operation.
If I ever manage to find seals for the master I simply have to press the stainless T nut out of the case and install the 20mm slave.
Attachments
-
 WIN_20240303_11_36_25_Pro.jpg750.7 KB · Views: 15
 -
 WIN_20240303_11_19_45_Pro.jpg700.4 KB · Views: 15
 -
 WIN_20240303_11_15_24_Pro.jpg305 KB · Views: 15
 -
 WIN_20240303_11_28_26_Pro.jpg357.2 KB · Views: 16
 -
 WIN_20240305_13_51_36_Pro.jpg292.8 KB · Views: 15
 -
 WIN_20240305_13_58_53_Scan.jpg456.9 KB · Views: 15
 -
 WIN_20240305_14_46_16_Scan.jpg410.7 KB · Views: 16
 -
 WIN_20240305_14_49_03_Scan.jpg393.9 KB · Views: 17